Webhooks
Incoming Webhooks#
Thirdlane Connect supports Incoming Webhooks, allowing external applications post messages to Thirdlane Connect Channels.
Incoming Webhooks can be used for monitoring alerts, posting registration or other events from your website, posting events from project management software, email, etc.
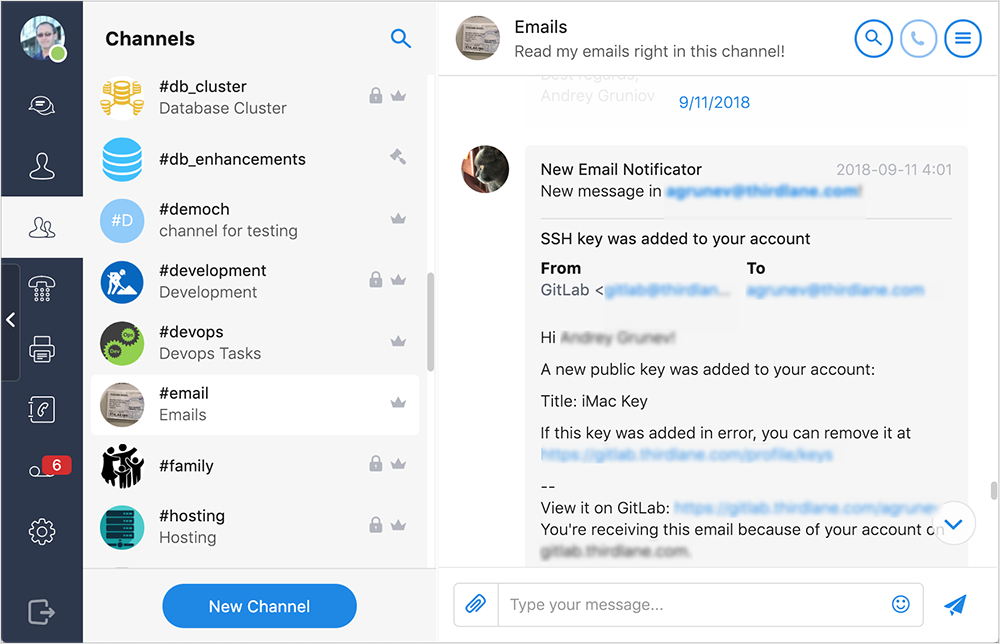
Here is an example of an email sent to a Channel using email integration:
Thirdlane Connect Webhooks are compatible with Slack webhooks, so many applications that have Slack integration will work with Thirdlane Connect.
Creating an Incoming Webhook is a matter of generating a unique URL to which external applications will send data in JSON format.
Creating Incoming Webhooks#
Process of creating Incoming Webhook is very simple:
Open the Integrations section:
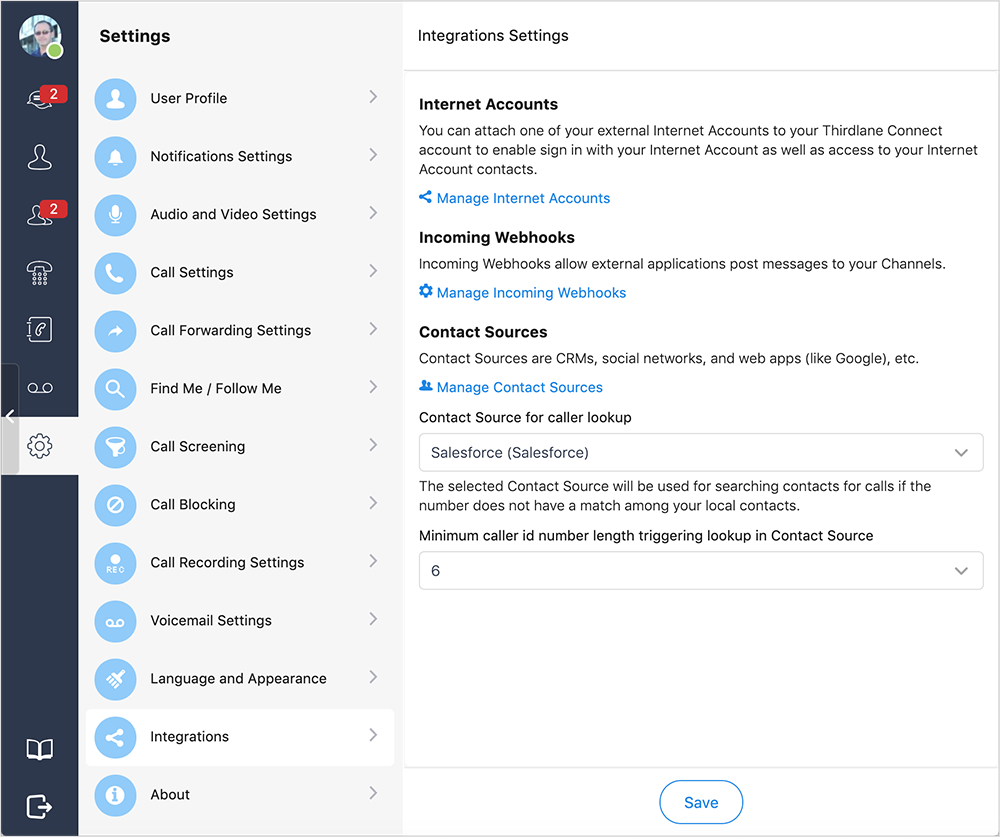
Creation of Webhooks requires a permission. If you don't see the "Manage Incoming Webhooks" option, you can request this permission from your administrator, or you can ask the administrator to create a Webhook for you.
Click on "Manage Incoming Webhooks" to open a screen where you can create new or manage existing Incoming Webhooks:
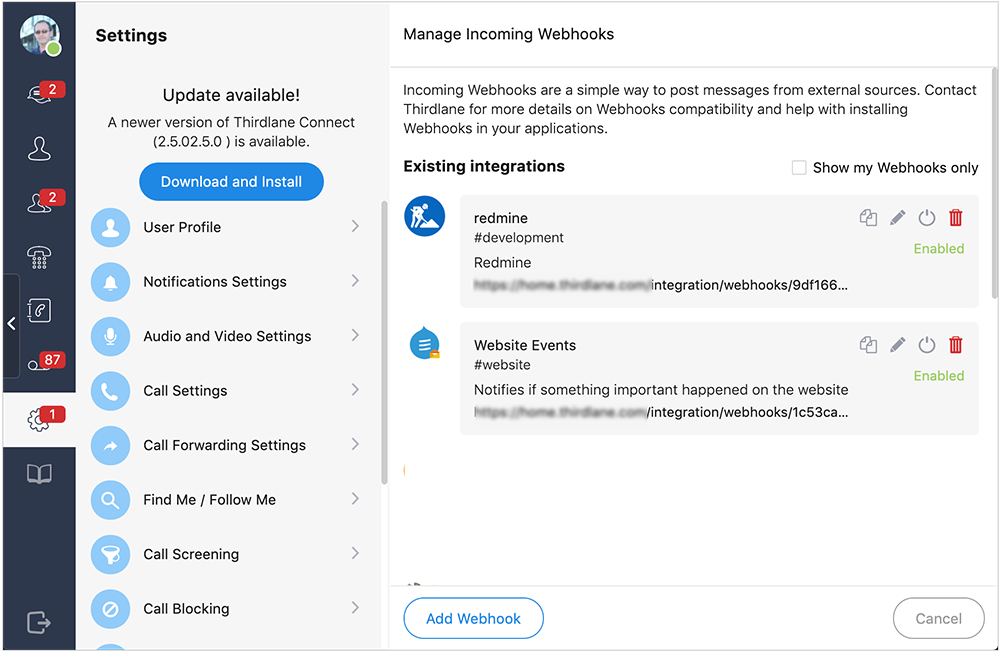
Click on "Add Webhook" and fill in the following fields:
Channel. Select a channel you wish to use for receiving incoming messages.
Name. Specify Incoming Webhook name.
Description. Add short description of the Incoming Webhook (optional)
Webhook is enabled. Allows you to disable or enable your Webhook, set it to "enabled" unless you want to ignore the messages passed to the Webhook.
Change picture. This allows you to add a picture that will appear in the channel for the Webhook messages.
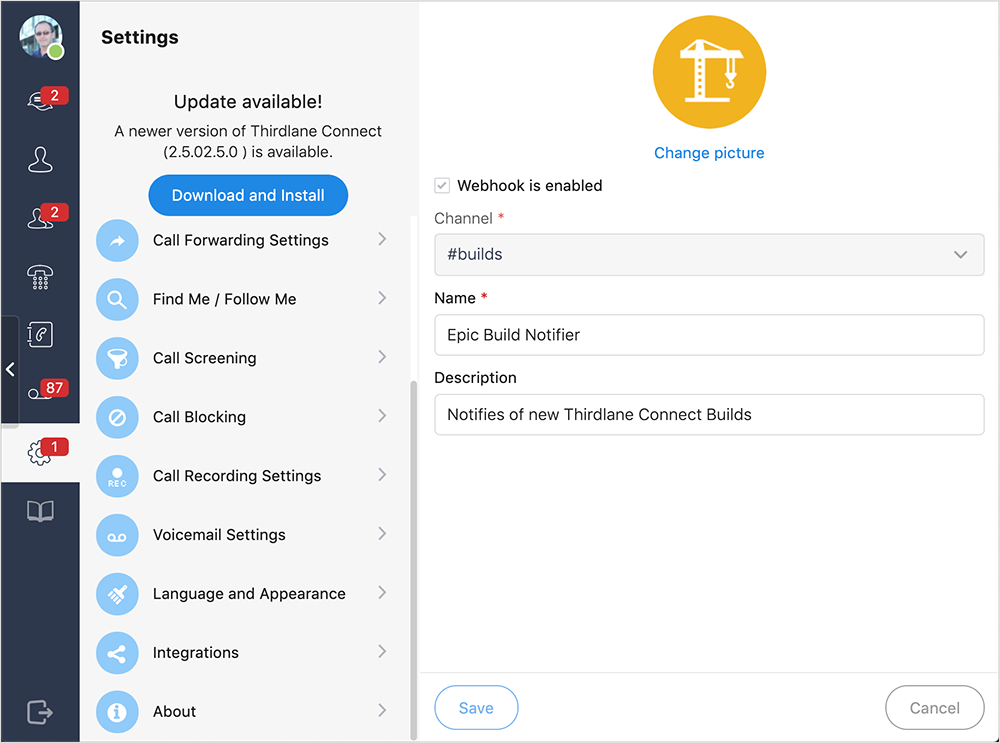
Click "Save" to save the new Webhook settings and generate unique URL for posting messages to this Webhook.
Integrating Your Custom Applications#
For custom applications' integration, you can use Curl program to simulate your application's messages first to fine-tune the message format, and then make sure that your application's messages have the same format as in your simulation.
Here is an example of JSON payload:
Note that the "text" attribute may have a link in the following format: <http://www.link.url|Link text>.
Here is an example of using Curl with the JSON payload above, posting to the Webhook with the `https://www.example.com/integration/webhooks/a1f0c101e0f1ddd9058adf56b6d40e96 URL:
The messages you send using the above command will appear in the Channel as shown below:

Once you are satisfied with the way JSON data is processed and presented, make sure that your application posts messages in the same format, point your application at the Webhook URL and verify that it is working as expected.
If necessary, you can add one or more attachments to your Webhook. Each attachment can have a title, a list of fields (each field should have own title and value) and a text string which will be displayed at the bottom. All attachments will be separated by a horizontal line.
Please contact us f you need assistance with your application integration.